Forums › Laser Treatment Tips and Techniques › Hard Tissue Procedures › For Paul, Danny and Hack2
- This topic is empty.
-
AuthorPosts
-
Glenn van AsSpectatorHi folks: I really am enjoying pushing the envelope. I posted this on DT but not everyone goes there so here it is for you.
Hope its interesting
Glenn
Hi folks, this is NOT one of my patients but a dentist friend of mine referred this nice lady to me. She is on aspirin, mid 60s and is self conscious about her smile because of the differences in height of the tissue levels.
I see her today for the first time and advise her that I can do some gingival recontouring but due to the differences in height I will have to remove some bone as well.
Here is the sequence quickly and the rationale and the photos will help you see what I did.
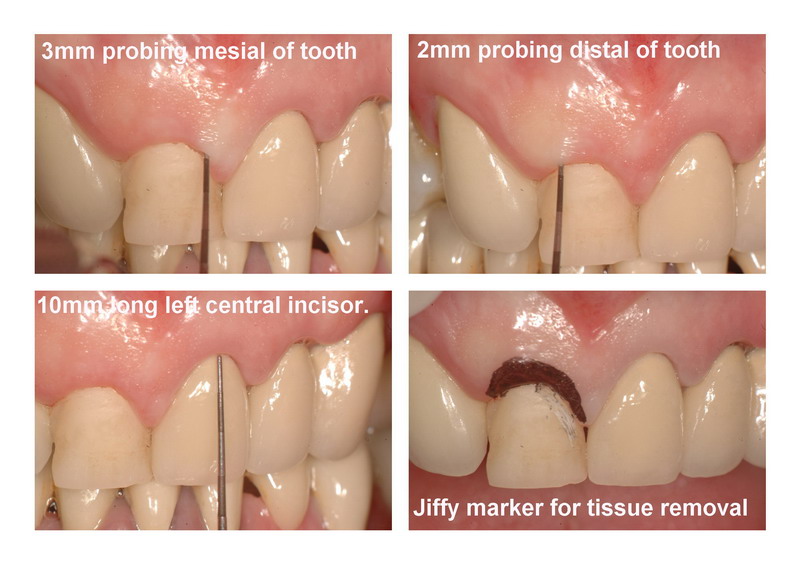
I had LOTS of attached tissue, but only 2-3mm of probing so in order to get the recontouring to stay (I had to take 3 mm off) I needed to remove bone.
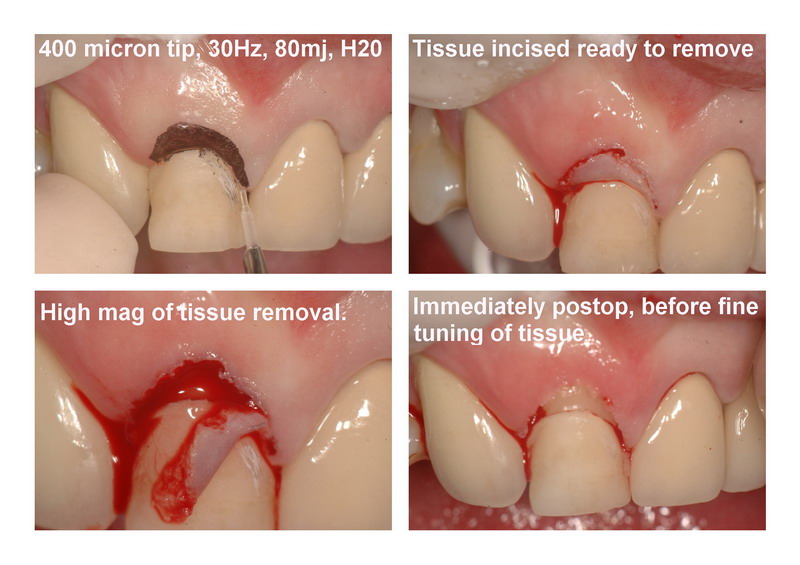
I marked the tissue with a jiffy marker to approximate the removal I needed. I did this with a 400 micron tip with air and water for arguments sake and got some bleeding which I coagulated with astringident. The patient was unaware that the tooth had a provisional temporary crown on it. I told her the edge of the tooth would be visible after the procedure and that a new crown would be needed at her dentists office.
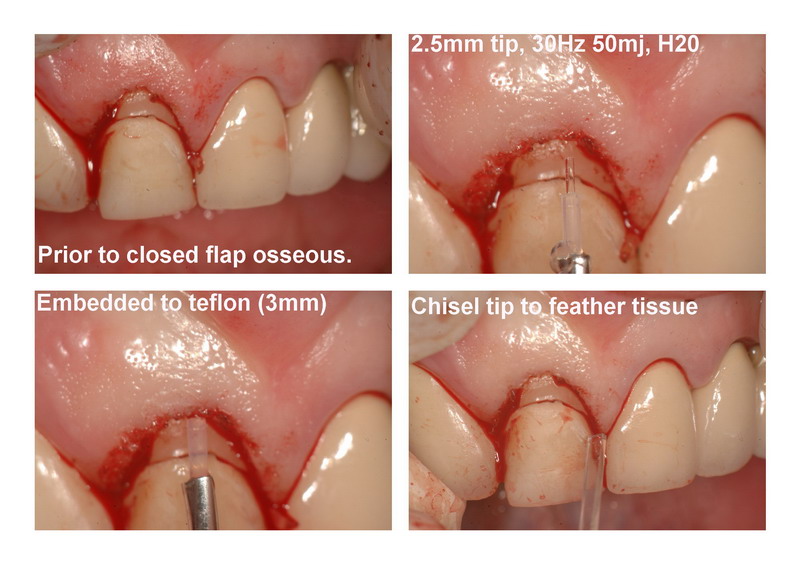
After the removal of the tissue I took a 400 micron tip (2.5mm to the teflon coating) and closed flapped the tip tactile method to remove bone. I also used the broader chisel tip to again go closed flap after the initial troughing was done.
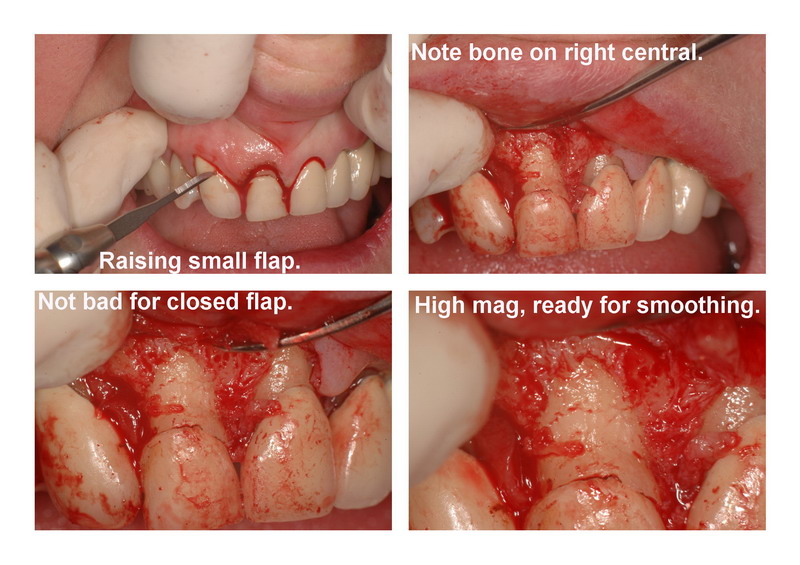
Then I raised a flap to see how I had done. Now it wasnt perfect but to my surprise I had done a decent job blindly doing this using the two tips when I compared the bone on the two centrals. I didnt use vertical incisions but my technique is slowly getting better. This took me about 50 mins with all the photos.
I used 6-0 sutures to tie up and was pretty pleased with the result. I think the patient liked it as well.
Anyways here are the photos, kinda neat to see the before and afters.
Glenn


Andrew SatlinSpectatorWay to go Glenn!!!!!
Now that wasn’t so bad right?
Soon your going to have to take back all those black triangle, root sensitivity and lets extract and place an implant comments. You are doing surgical periodontics.
Just joking of course.
Very nicely done!!! Great before and after documentation.
I would have handled this case the same way!
Thanks for sharing.
Andy
ASISpectatorHi Glenn,
Excellent handling! Great usual documentation of high standard again. Which camera is this now?
Did you have to recontour the osseous level to #21 upon flap being raised, as in one photo it appeared #11 was more apical than #21?
Very very nice.
Now that a respectable osseous relief has been shown that it can be achieved closed, the question then becomes: Will the routine approach be closed or open in a similar tissue biotype and alveolar process configuration?
Thanks for posting, Glenn.
Andrew
Glenn on the roadSpectatorHi Andy….thanks and I take back all the dark triangle , root sensitivity, implant comments now that I am a board certified periodontist…….ah wait a minute……….
GRIN
I feel this distressing need to start reading Pubmed to look at abstracts and research!!
Nah , just joking! Thanks for the comments but I still feel like that I should be doing things differently in certain areas but I will try to get Danny to give me a few more tips.
I appreciate all the help that you and Hack gave me in Vegas at Bobs meeting and if I have any degree of success it is through the learning I have done here from others cases.
Andrew!
Hi there, well I looked at the photos, the first photo the flap is not raised high enough and what you are looking at is part of the soft tissue , not actually the root. I never touched the 21 (left central) just the right one. I tried as Danny mentioned to make the two symmetrical. There was 3mm of soft tissue at the end over the bone.
I think that for now I will continue to raise flaps and see if I can figure out when it is ok to do closed flap and when it isnt and maybe I will post photos for Danny and Andy and Hack to look at and see if they see big errors that I created from the closed flap. Low low low settings and the chisel tip seem to make a big big difference.
Anyways, hope that is what you wanted to hear and I look forward to chatting with you soon. I have a BIG big surprise ready for the March 23rd VLG meeting (actually 2 surprises for the office) but you are going to have to be here to know what they are!!
GRIN
Cya and thanks for all your kind words and friendship.
Glenn
-
AuthorPosts
