Forums › Erbium Lasers › General Erbium Discussion › Microdental prep
- This topic is empty.
-
AuthorPosts
-
Glenn van AsSpectatorHi folks: Here is a simple thing to think about. I am finding that it is very rare that I look at a tooth under the scope where I feel that the standard fissure sealant is indicated.
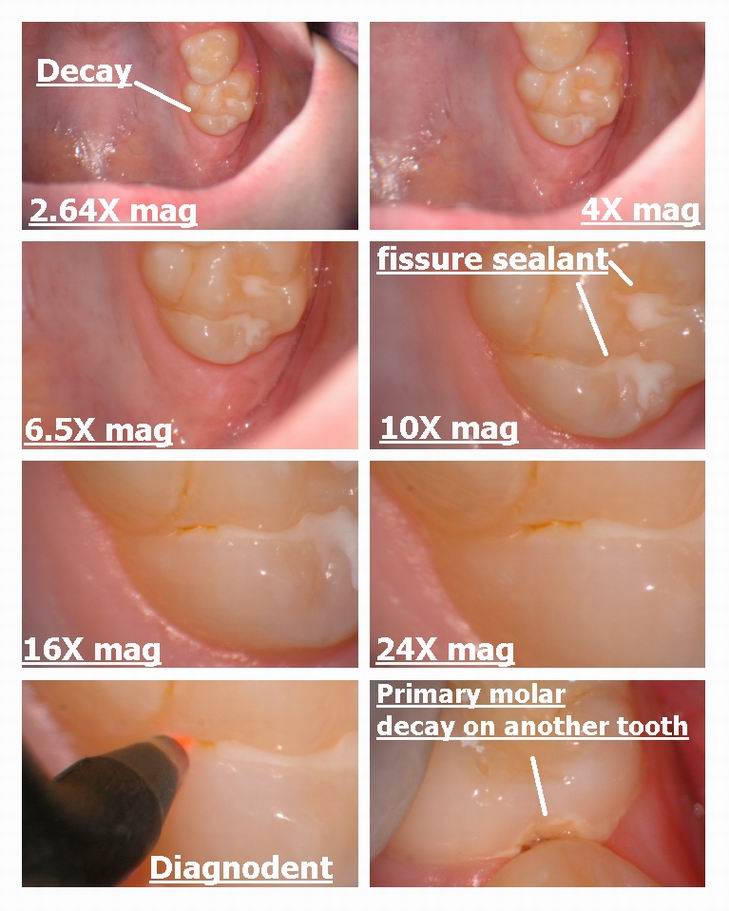
I am writing an article for the ORal health magazine which will be out in the spring on microdentistry and the two most important things for me have been in the introduction of high magnfications to see subtle changes in color of enamel and fissure decalcifications present at magnfications of 10X and above. The second useful tool is the diagnodent which allows me to decide if the decay I spot at high magnfication is progressing into dentin.
I find many times that if I look at high mag that part of the groove is decalcifying and then I dont feel comfortable just covering over it with a sealant. I have been using the laser ( a 400 micron tip) to gently etch the enamel surface at 30 hz adn 100 mj or so (3watts) and then filling with a flowable resin.
This is my glorified resin. Now many years ago I would just fill the small spot that was decaying (in this case the distal pit was 25 on the diagnodent and the buccal was 27), and then leave the rest or FS them. Guess what, when I remove the FS now in alot of cases they arent sealing anything……just the decay is in there and when it gets big enough the FS falls out and you have a stained groove.
At least with the flowables they show you when they are leaking on the external surface.
I dont know if this is right or wrong but just doing fissure sealants on erupted teeth is not something I do routinely now.
How are you handling the following:
1. Fissure sealants
2. Preventative Resin restorations where there is a little bit of decay in one pit.
3. Decay around Fissure sealants.Here is my case……..hoping to stimulate some discussion.
Glenn

Glenn van AsSpectatorHere is another case where the distal pit was in the 20s with the diagnodent and so I removed the mesial pit FS not knowing if there would be anything under it and in this case there wasnt but in many cases there is.
Other cases similar to this can be found at the following links……..
http://www.rwebstudio.com/cgi-bin/ikonboard/topic.cgi?forum=25&topic=27
http://www.rwebstudio.com/cgi-bin/ikonboard/topic.cgi?forum=25&topic=31<img src="https://www.laserdentistryforum.com/attachments/upload/Resize of Class one microdental prep case 2.jpg
” border=”0″>
Glenn van AsSpectatorHere are the pics from the other case I wanted to show.
Glenn
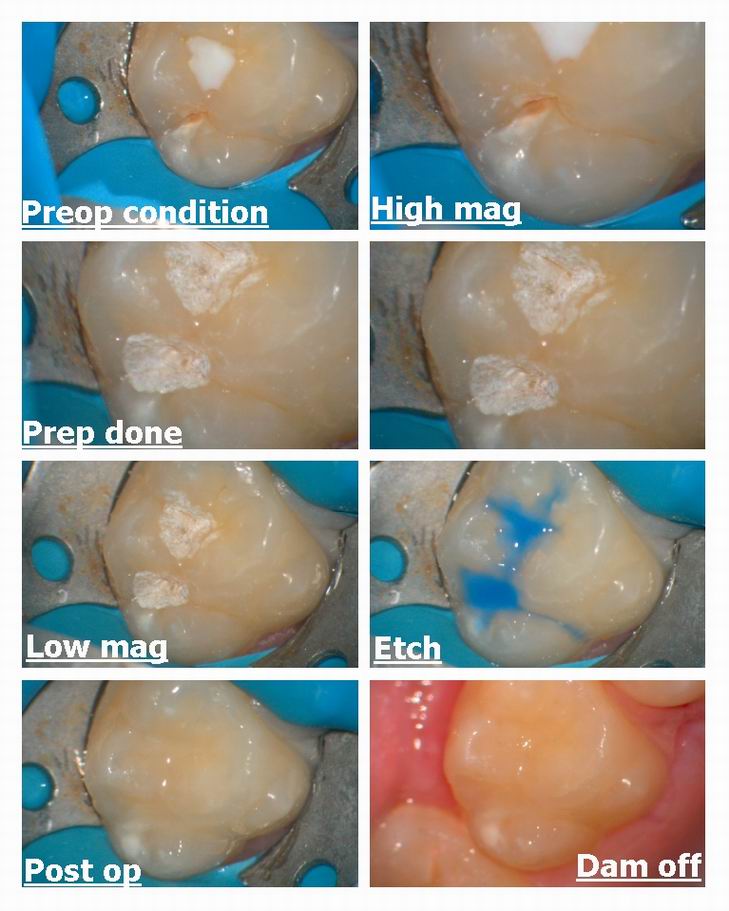
Glenn van AsSpectatorHere is a tooth that I am going to prepare soon , which shows the same tooth at the 6 steps of magnification under the scope and how the decay becomes more noticeable with high mag.
The patient has decay on the lingual grooves (both of them) and in addition on the diagnodent it was 27 . THe magnification helps me find the spots and then the diagnodent confirms what visually I notice.
(trying to build my case here!!)
Glenn
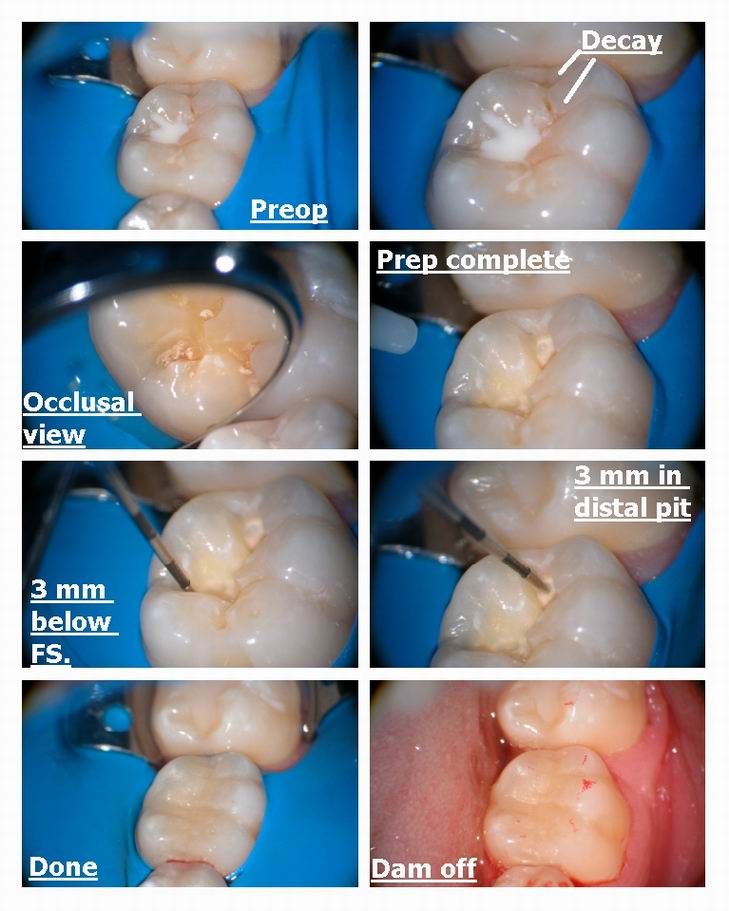
Glenn van AsSpectatorAm I making anyone else uneasy besides myself from all those darn fissure sealants they told me in dental school to plug in if there was stain and no cavitation?
Another one for the books.
Glenn
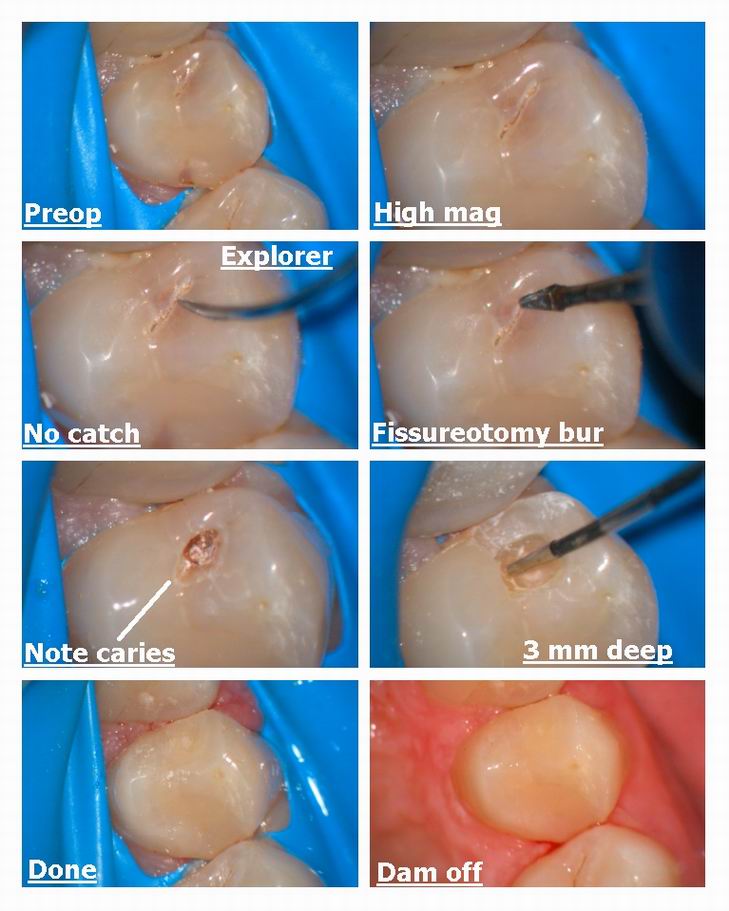
Glenn van AsSpectatorJust to show you that I dont do them all with my laser.
Here is a fissureotomy bur which opened up a non cavitated but visibly discolored lesion which was large (forget the number) on the diagnodent.
Glenn
Glenn van AsSpectatorOk ok I have made a point…….one last one .
Glenn
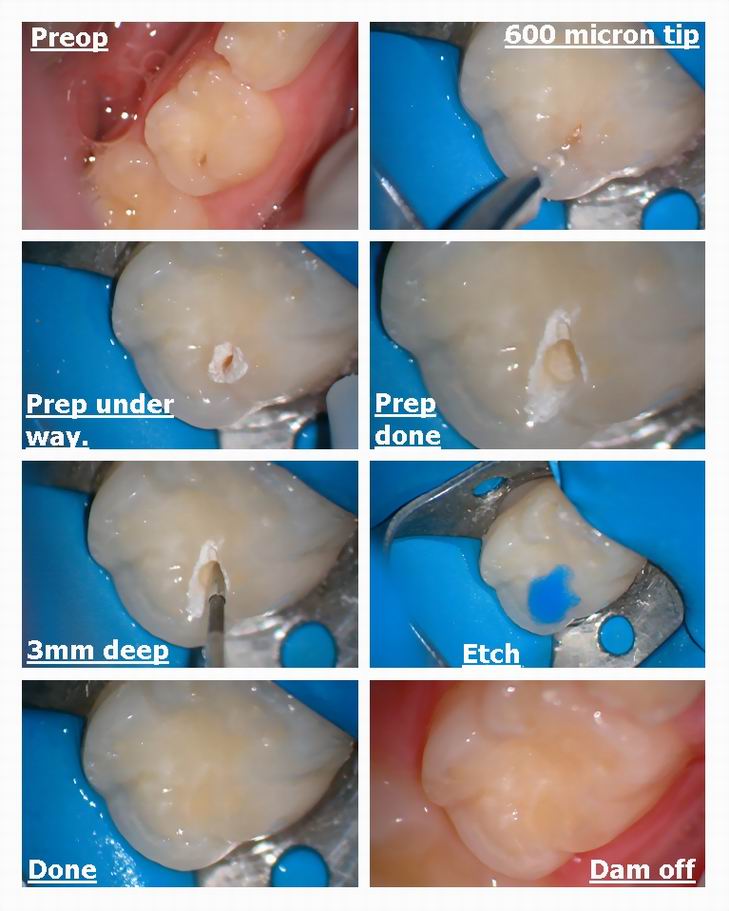
PatricioSpectatorGlenn,
Two comments. I was trying yesterday to decide what curing light to take with me to Bolivia next week and realized that we rarely use the lights in hygiene except for spot bleaching. We simply are not doing sealants anymore.
Yesterday I also had a moment when I realized how much more beautiful the tooth was under high magnification. Must be like seeing the moon at 16x!
I also opened an occlusal as you are showing only to find the deepest decay was not where the DD had indicated. Maybe 16X would have noted this area better.
Thanks,
Pat
AnonymousGuestQUOTEQuote: from Glenn van As on 2:53 am on Mar. 1, 2003How are you handling the following:
1. Fissure sealants
2. Preventative Resin restorations where there is a little bit of decay in one pit.
3. Decay around Fissure sealantsGlenn
Glenn,
I haven’t placed conventional sealants in the last 2-3 years.
When I’m restoring part of a tooth I have been using flowable in the deep grooves on the remainder of the tooth if there is no discoloration and very low Diagnodent numbers(after laser etch or air abrasion).
In the last couple months, if there is no restorative planned for the tooth but I still feel a sealant is warranted, I place Fuji Triage.
If there is decay around a sealant ,I remove the sealant when treating the decay and do one of the above along with the restoration.
Its sometimes difficult to tell around old sealants if the sealant is just stained or there is decay starting. This is another place the higher power loupes seem to help.
SwpmnSpectatorI totally agree with you Glenn and Ron. We place very few fissure “sealants” these days. The fact is conventional “sealants” were probably only good for fissure anatomy that wouldn’t get caries in the first place!!!!
Al
BenchwmerSpectatorSince I started using Air Abrasion about 9 years ago all my sealants are prepared w/ microabrasion, bonded w/ DBAs, then restored w/ flowable composite,
If any stain or caries present I remove all resin w/ AA. Need magnification.[img]https://www.laserdentistryforum.com/attachments/upload/Before.JPG[/img]
See case:
[img]https://www.laserdentistryforum.com/attachments/upload/Before.JPG[/img]
[img]https://www.laserdentistryforum.com/attachments/upload/After AA.JPG[/img]Note more caries present under intact sealant that unsealed grooves or failinf sealant
[img]https://www.laserdentistryforum.com/attachments/upload/Restored.JPG[/img]
Note dentin caries after AA. This is what I got Erb:YAG for for caries removal and disinfection.
I use a 7th generation DBA, I-Bond for 30 seconds, thin w/ air, No light cure yet.
Restore w/ flowable composite, vibrate out any bubbles, light cure.
Adjust bite, polish.
If after AA if not into dentin, charge out as sealant. If into dentin, charge out as a one surface restoration.
The bonding agents have changed over the years, but predictable, conservative, microdentistry. -
AuthorPosts
